Turn a Photo into a High-Contrast Stencil Preview
Turn one authorized photo into a high-contrast stencil preview built from connected light and dark regions while preserving the main silhouette, pose, and recognizable composition.
Sign in required before running this tool.
No Credits are charged until you run the tool.
Optionally describe the subject to emphasize, small textures to suppress, and the connected regions that must remain readable.
What is Photo to Stencil?
Photo to Stencil reduces color, tonal variation, and fine texture into connected light and dark regions that keep the subject silhouette readable. Use it to judge whether a pose and recognizable composition survive simplification. The result is a raster stencil preview, not a line drawing, not an editable vector, not a fabrication-ready file, and not a tattoo-transfer design.
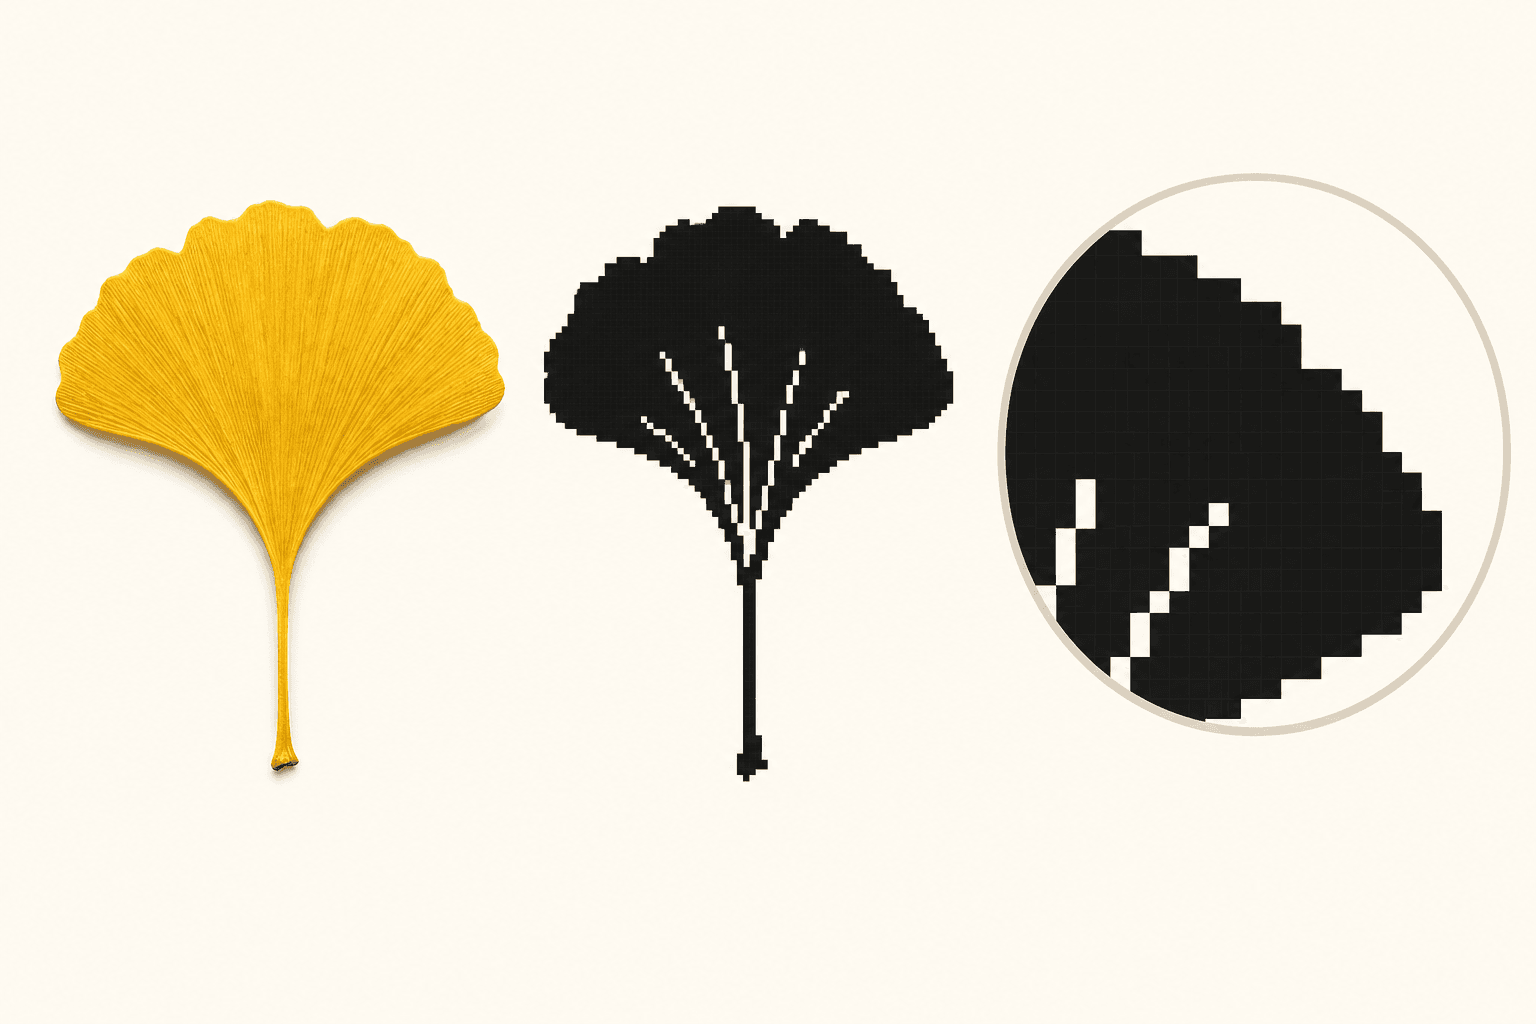
Will the subject still read when fine detail disappears?
Preview the balance of connected positive and negative regions before manually rebuilding any specialized production artwork in another application.
How to use Photo to Stencil
- 1
Choose a silhouette-friendly source
Upload one private PNG, JPEG, or WebP with a clear subject outline and a composition you are authorized to use.
- 2
Find the connected shape structure
Identify the broad light and dark regions that should remain connected when small color and texture differences disappear.
- 3
Describe useful simplification guidance
Optionally use 4 to 2,000 characters to name the subject, expendable texture, and openings that must remain readable.
- 4
Generate the raster stencil preview
Run the single-image edit knowing that it may simplify tone and texture but must preserve silhouette, pose, and composition.
- 5
Check region continuity and recognition
Inspect connected regions, edge clarity, silhouette, pose, and recognizable composition before using the private preview as a redraw reference.
Examples
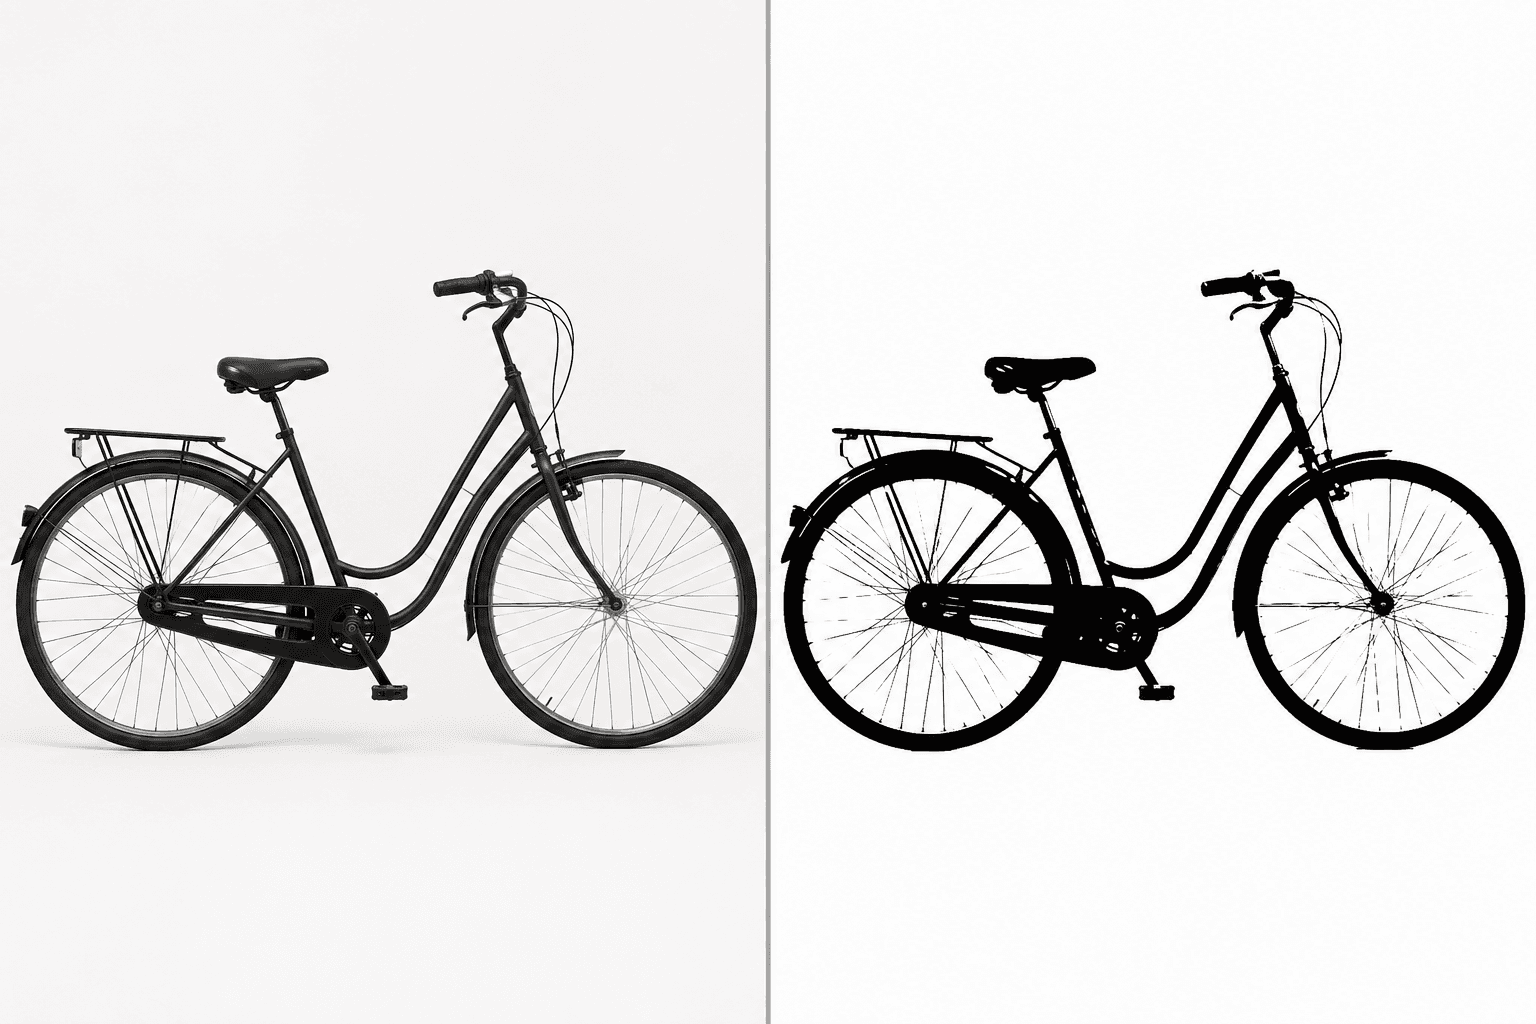
Bicycle silhouette study
Simplify this unbranded side-view bicycle into high-contrast raster regions; preserve both wheel circles, frame silhouette, handlebar, saddle, and original side-view composition, and leave disconnected thin areas honest.
One private PNG raster stencil preview with the bicycle silhouette preserved and thin disconnected regions visible for manual review.
Use cases
Check whether an authorized subject remains recognizable after fine tonal and texture detail is reduced.
Compare positive and negative region balance before manually designing a final graphic in specialist software.
Provide a private raster direction that an illustrator can independently rebuild and validate for its intended medium.
Why use Photo to Stencil?
Connected-region simplification
Color, tonal variation, and small texture can consolidate into bold connected light and dark areas.
Silhouette and pose protection
The main subject outline, pose, and recognizable composition remain the fixed visual reference.
Task-specific texture guidance
Optional instructions identify expendable detail and the openings or boundaries that should remain legible.
Private raster preview
A successful result is saved to My Media as one private PNG with its source relationship, not as editable production geometry.
Limits
FAQ
How does a photo become a stencil preview?
The edit reduces color, tonal variation, and small texture into bold connected light and dark regions. It should keep enough negative and positive shape information for the subject silhouette, pose, and overall composition to remain recognizable.
Which parts of the source must stay recognizable?
The main subject silhouette, pose, and recognizable composition must remain intact. The tool may simplify internal detail, but it must not introduce a different subject, rearrange the pose, or change the source framing into a new design.
What kind of photo produces a clearer stencil preview?
Choose one image with a distinct subject outline, useful separation between subject and background, and limited clutter across important edges. Tiny repeated texture, low contrast, or overlapping shapes may merge, so inspect whether the major regions still connect clearly.
How should I use the optional stencil guidance?
In 4 to 2,000 characters, name the subject to emphasize, the fine texture that can be reduced, and any opening or boundary that must stay readable. The guidance cannot override the fixed preservation, safety, or output boundaries.
How is this different from Photo to Line Drawing?
A stencil preview organizes the image into connected high-contrast light and dark regions. A line drawing instead emphasizes contours, line weight, and sparse shading. Use this page to evaluate solid region readability rather than line tracing or hatch structure.
Why is the result not a production stencil file?
The saved image is a flattened raster preview. It is not an SVG, does not provide editable paths, and is not a laser-cut, vinyl-cut, CNC-ready, fabrication-ready, or tattoo stencil transfer file. Rebuild and validate production geometry separately.
Which files, sizes, and storage rules apply?
Upload one authorized PNG, JPEG, or WebP up to 20 MB, between 64 and 4096 pixels on each side. A successful run saves one private PNG to My Media and retains its source relationship for later review.
What happens when no usable stencil preview is saved?
A refusal, technical failure, or empty result does not create a usable saved image. When no usable result is saved, the existing Credit release or refund policy applies; revise the source or simplification guidance before trying again.
Related tools
Start using Photo to Stencil now
Turn one authorized photo into a high-contrast stencil preview built from connected light and dark regions while preserving the main silhouette, pose, and recognizable composition.
Run Photo to Stencil